ICS Plugin Installation Tutorial
The ICS Plugin Installer will install integration components into the IBM Cognos Analytics installation. This installer should be performed on each IBM Cognos Analytics Content Manager Server. The IBM Cognos Analytics environment should be stopped during the ICS Plugin installation.
Notes: The plugin install is used to create and manage a filter file in the IBM Cognos Analytics environment. The filter is still required in the IBM Cognos Analytics environment so that the instance knows that ICS has been integrated and is running. Future ICS Plugin upgrades are not required unless noted in the Hotfix guide and check all versions up to the current installed version for upgrades.
To begin the ICS Plugin installation download the ICS Automatic Installer package and extract the ICSPlugin_windows.exe. Execute this installer and allow the process to run with elevated administrative capabilities. This installer should be run on every installation of an IBM Cognos Analytics Content Manager. Before running this installation be sure the IBM Cognos Analytics Service is stopped, and the ICS Service has already been installed.
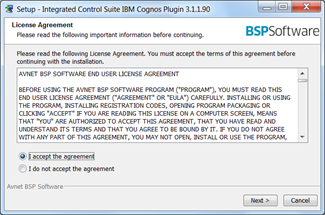
Step 1. Accept the license agreement
Review and accept the End User License Agreement.
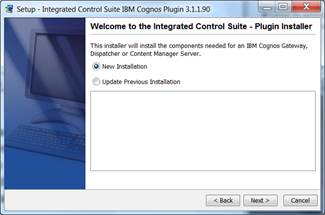
Step 2. Choose the installation type.
After accepting the End User License Agreement The option to perform a new installation or upgrade an existing one will be presented. Choose New Installation and select Next.
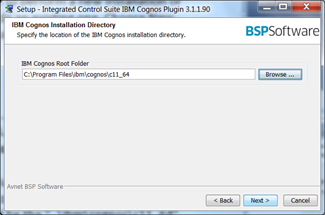
Step 3. Choose an IBM Cognos Analytics Root Directory to install into.
The Plugin installer will only install into a valid IBM Cognos Analytics Root Directory. This should be the “..\ibm\cognos\” directory, or the equivalent directory for the environment.
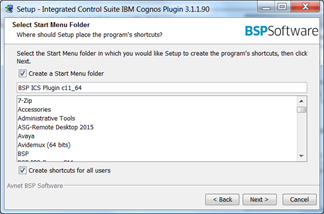
Step 4. Select the Start Menu Folder
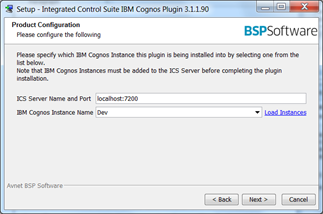
Step 5. Specify the Configuration Settings
Specify the server and port number of the ICS Server. This is the Listening Port defined in Step 4 of the ICS Server configuration.
Specify an IBM Cognos Instance Name. This is the name of the IBM Cognos Analytics environment that was defined on the ICS Configuration Web Page in Step 7 of the ICS Server configuration. The environment selected will incorporate the plugin into that installation. Click the “Load Instances” link to populate the IBM Cognos Instance Name dropdown list.
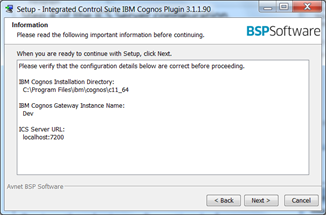
Step 6. Review the Installation
Review the plugin configuration before proceeding. Once confirming the information is correct, click “Next” to perform the installation.
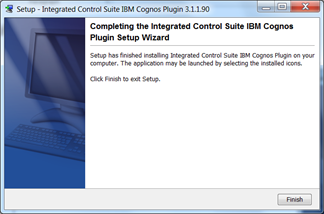
Step 7. After the installation completes, Click “Finish”.
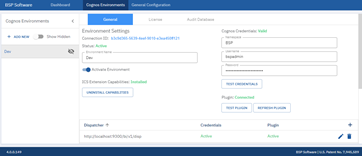
Step 8. Restart IBM Cognos and navigate back to (http://{server name}:{port number}/) and verify the plugin is connected.

