ICS Server Configuration Tutorial
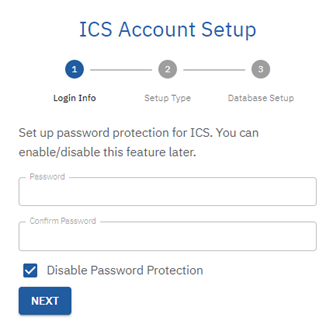
Step 1. ICS Account Setup
Open the ICS Configuration page (http://{server name}:{port number}/) in a supported browser. In a new installation you will see a step through process.
If required enter a password to protect the ICS configuration. Note: You can disable/enable this feature later on the configuration screen.
Click the “Next” button to navigate to the next screen.
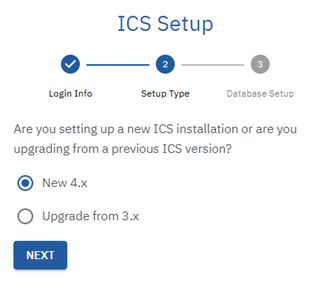
Step 2. ICS Setup
Select the appropriate option for your setup and click the “Next” button.
Note: Below we will show both options.
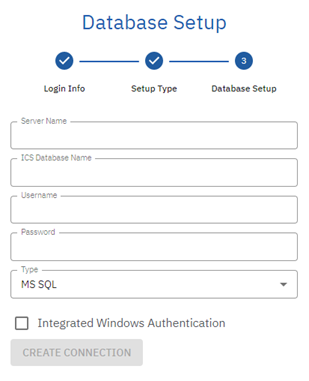
Step 3a. New 4.x Database Setup
Enter the pre-configured database information and click the “Create Connection” button
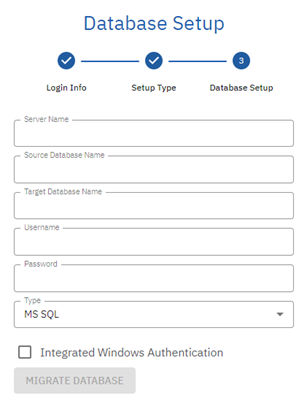
Step 3b. Upgrade 3.x Database Setup
Enter the pre-configured database information and the original ICS 3.x database name. Click the “Migrate Database” button.
Once you click the migrate button, we will move the needed information from the previous database to the updated tables in the 4.x database. This will most likely take some time to complete, depending on your database size.
Note: We chose this approach so if something did go wrong with the migration, or for some reason 4.x doesn’t work for you. You would have the option to revert back to 3.x.
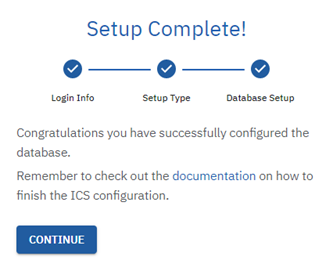
Step 4. Setup Complete
Click the “Continue” button.
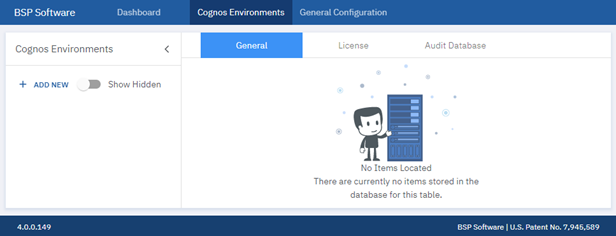
Step 5. Adding Cognos Environments
Next, we need to setup your Cognos environments. Navigate to the Cognos Environments tab and click the “Add New” button on the left. Click save.
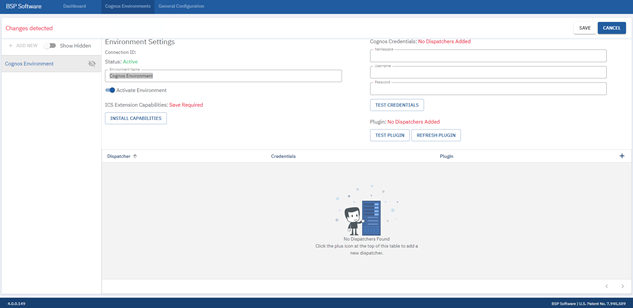
Step 6. Setup Cognos Environments
Next, we need to update your Cognos environment information. Enter the environment name, Cognos credentials, and a valid dispatcher.
Note: The Cognos Credential needs to be an admin user directly in a Cognos Administrators Role.
Step 7. Install Capabilities
Once you have setup your environment and we are connected. We need to install the ICS capabilities.
The ICS capabilities are installed in Cognos. This allows you to use Cognos to manage the ICS security.
The ICS capability also gives us a known location to connect the ICS extension to the ICS service.
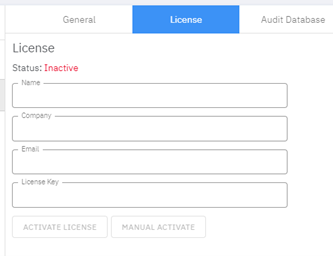
Step 8. License
Navigate to the License tab for the selected environment and enter the license information to activate the license.
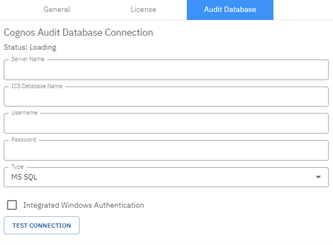
Step 9. Audit Database
Optional: Navigate to the audit database tab for the selected environment and enter the audit database information.

